Enable chains
When a chain is enabled to your organization, all tokens supported on that chain become available for use in your wallets. The chain will be considered in use and will count against your plan quota. Additional charges apply if the total number of enabled chains exceeds the quota.Prerequisites
- The chain you want to enable must be supported by Cobo. To view the complete list of supported tokens and chains, please refer to Supported Tokens and Chains.
- You have been assigned the Admin, Manager, or Operator role.
Enable chains in the pricing plan
- Log into Cobo Portal.
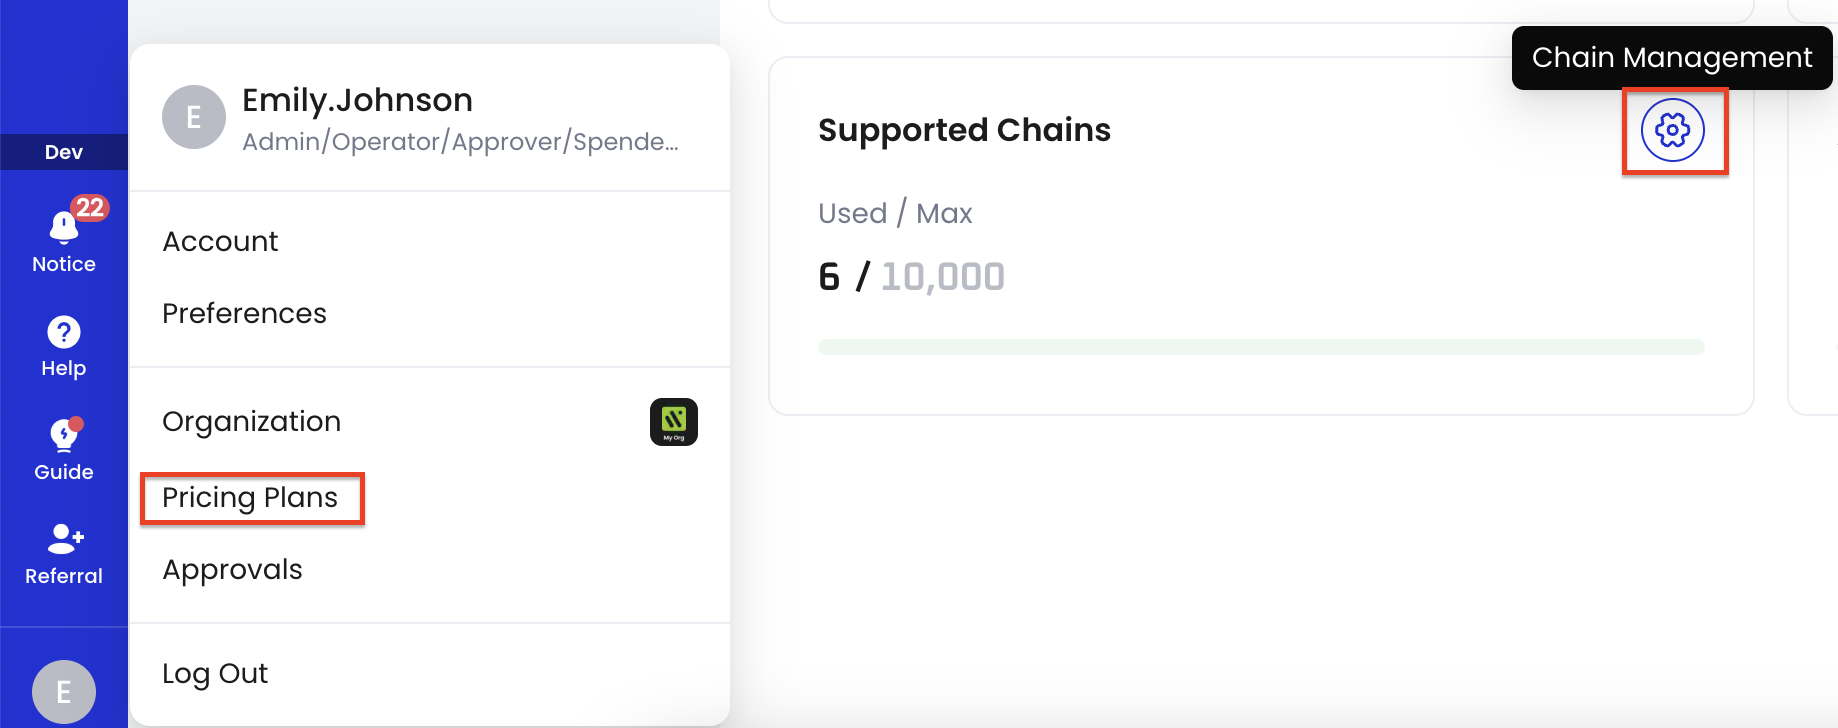
- Click the profile icon at the bottom left, and then click Pricing Plans.
-
Navigate to Supported Chains and click the Chain Management icon.

- On the Chain Management panel, click Add Chains.
- In the Add Chains dialog, select the chains you want to add, and click Confirm.
- Select a multi-factor authentication (MFA) method for authentication.
Enable chains when adding tokens
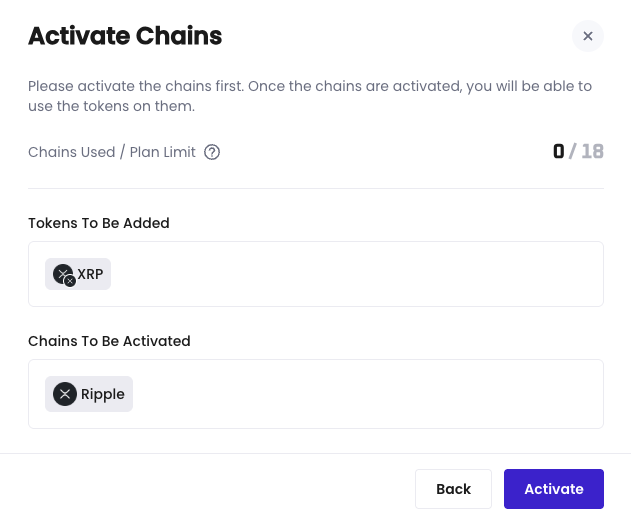
You can also enable the chain when adding tokens. If the chain of the token you want to add is not enabled, an Enable Chain dialog will pop up, showing the chain and token you want to add. After successful authentication, the chain will be added to your organization.
Disable chains
After a chain is disabled, tokens associated with it will no longer be visible in your wallet. To access those tokens again, you must first enable the chain. Starting from the next billing cycle, the disabled chain will no longer be considered in use and will not count toward your usage quota or incur additional charges.Steps
- Log into Cobo Portal.
- Click the profile icon at the bottom left, and then click Pricing Plans.
-
Navigate to Supported Chains and click the Chain Management icon.

- On the Chain Management panel, click the delete icon next to the chain you want to delete.
- In the confirmation dialog, click Confirm.
- Select a multi-factor authentication (MFA) method for authentication.
