> ## Documentation Index
> Fetch the complete documentation index at: https://manuals.cobo.com/llms.txt
> Use this file to discover all available pages before exploring further.
# Assign user roles to members
> Learn how to assign user roles to new and existing members in Cobo Portal, streamlining permissions and enhancing team management.
Assigning user roles to members requires the appropriate permissions. If you cannot access the **Members** or **User Roles** management pages, or if you see **No Permission**, contact your organization admin and request the role shown on the page or a role that includes the required member and role management permissions.
You can assign user roles to either new or existing members.
## Assign user roles to new members
To assign user roles while inviting new members:
1. Log in to [Cobo Portal](https://portal.cobo.com/login) and click your profile avatar in the top-right corner.
2. Choose **Organization** from the dropdown menu.
3. Click the **Members** tab.
4. Click **Invite Members**.
5. In the **Invite Members** dialog, select the appropriate **User Roles** for the new member.
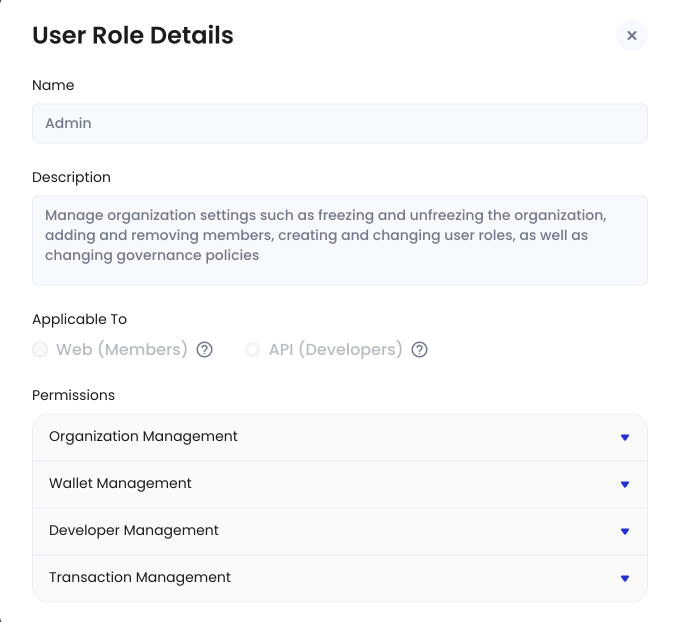
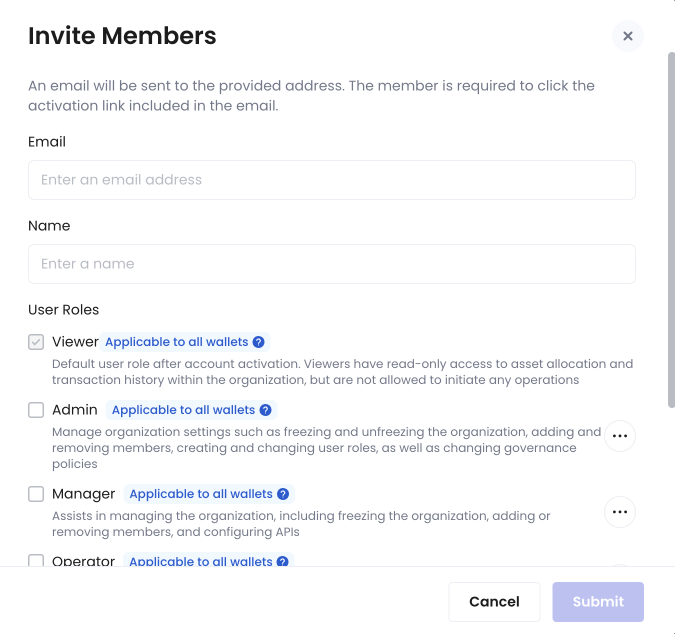 * To view details about each user role, hover over the more icon
  and click **View User Role Details** to display the **User Role Details** dialog.
 * To set a wallet scope to each user role, hover over the **Applicable to specific wallets** label and click **Edit Wallet Scope** to display the **Set Wallet Scope** dialog. Select the wallet types to which the role applies and click **Confirm**.
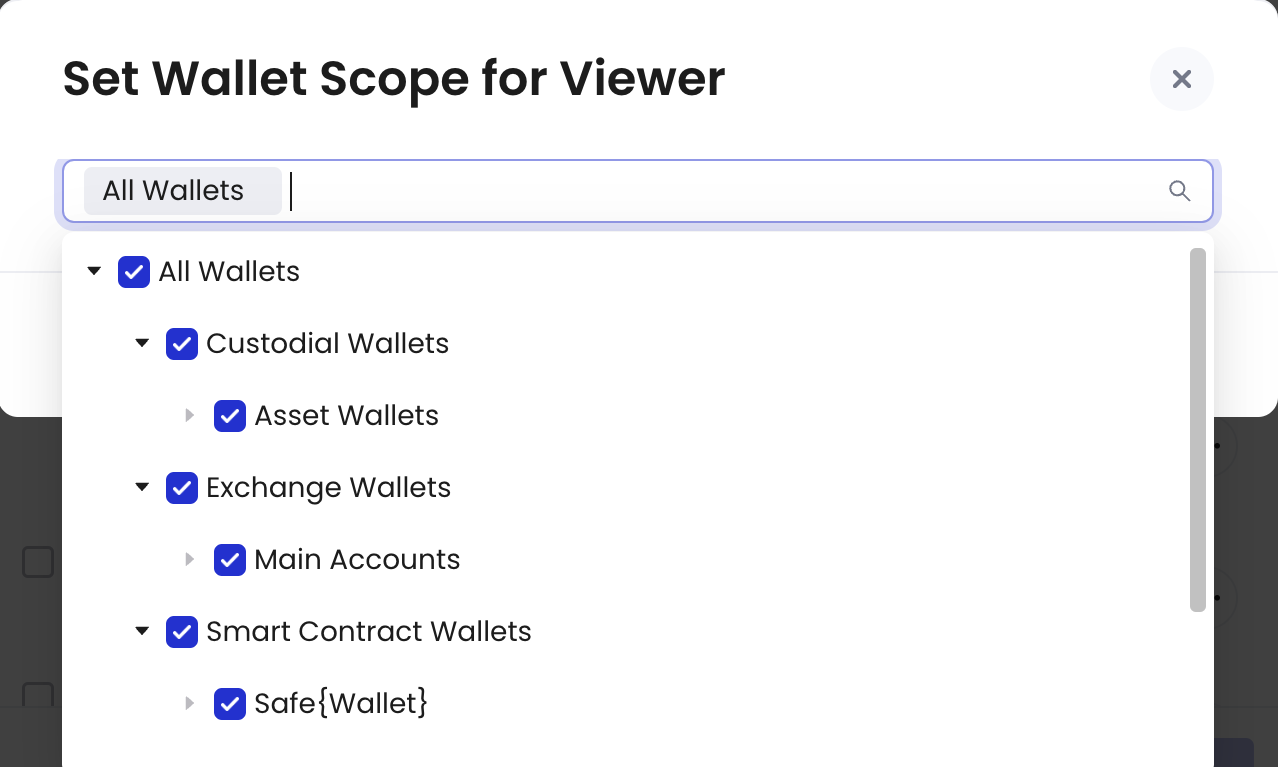 For example, if you select **Viewer** and set the wallet scope to **MPC Wallets**, the member will have the viewer permissions to MPC Wallets only.
You cannot modify the wallet scope for the user roles Approver, Admin, and Manager.
6. Complete the invitation process by providing the rest of the required information and clicking **Submit**.
This method allows you to set permissions for new members before they join your organization.
## Assign user roles to existing members
To assign user roles to existing members:
1. Log in to [Cobo Portal](https://portal.cobo.com/login) and click your profile avatar in the top-right corner.
2. Choose **Organization** from the dropdown menu.
3. Click the **Members** tab.
4. Locate the member you want to modify and click the **Modify User Role**
For example, if you select **Viewer** and set the wallet scope to **MPC Wallets**, the member will have the viewer permissions to MPC Wallets only.
You cannot modify the wallet scope for the user roles Approver, Admin, and Manager.
6. Complete the invitation process by providing the rest of the required information and clicking **Submit**.
This method allows you to set permissions for new members before they join your organization.
## Assign user roles to existing members
To assign user roles to existing members:
1. Log in to [Cobo Portal](https://portal.cobo.com/login) and click your profile avatar in the top-right corner.
2. Choose **Organization** from the dropdown menu.
3. Click the **Members** tab.
4. Locate the member you want to modify and click the **Modify User Role**  icon next to their name.
5. In the **Modify User Role** dialog, select the appropriate **User Roles** from the menu.
icon next to their name.
5. In the **Modify User Role** dialog, select the appropriate **User Roles** from the menu.
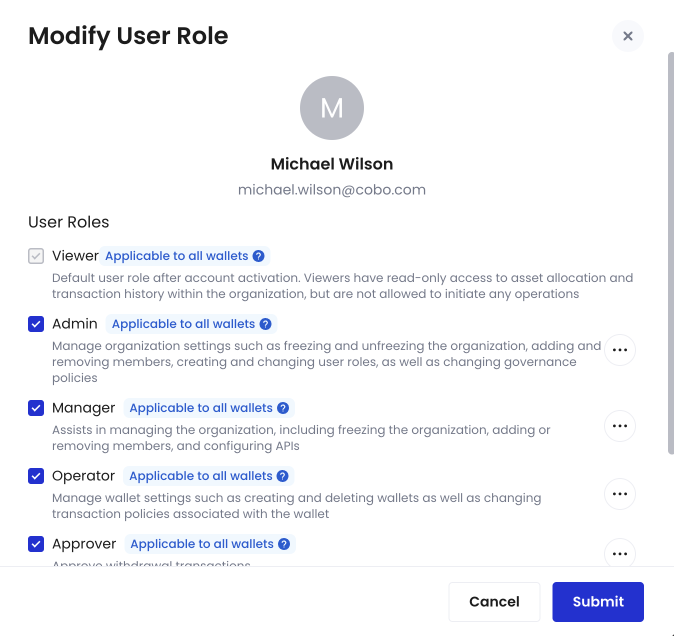 * To view details about each user role, hover over the more icon and click **View User Role Details** to display the **User Role Details** dialog.
* To set a wallet scope to each user role, hover over the **Applicable to all wallets** or **Applicable to selected wallets** label and click **Edit Wallet Scope** to display the **Set Wallet Scope** dialog. Select the wallet types to which the role applies and click **Confirm**.
For example, if you select **Viewer** and set the wallet scope to **MPC Wallets**, the member will have the viewer permissions to MPC Wallets only.
The wallet scope of Admin, Manager, and Approver cannot be modified.
6. Click **Submit** to apply the changes.
This process allows you to update permissions for existing members as your organization's needs evolve.
* To view details about each user role, hover over the more icon and click **View User Role Details** to display the **User Role Details** dialog.
* To set a wallet scope to each user role, hover over the **Applicable to all wallets** or **Applicable to selected wallets** label and click **Edit Wallet Scope** to display the **Set Wallet Scope** dialog. Select the wallet types to which the role applies and click **Confirm**.
For example, if you select **Viewer** and set the wallet scope to **MPC Wallets**, the member will have the viewer permissions to MPC Wallets only.
The wallet scope of Admin, Manager, and Approver cannot be modified.
6. Click **Submit** to apply the changes.
This process allows you to update permissions for existing members as your organization's needs evolve.